
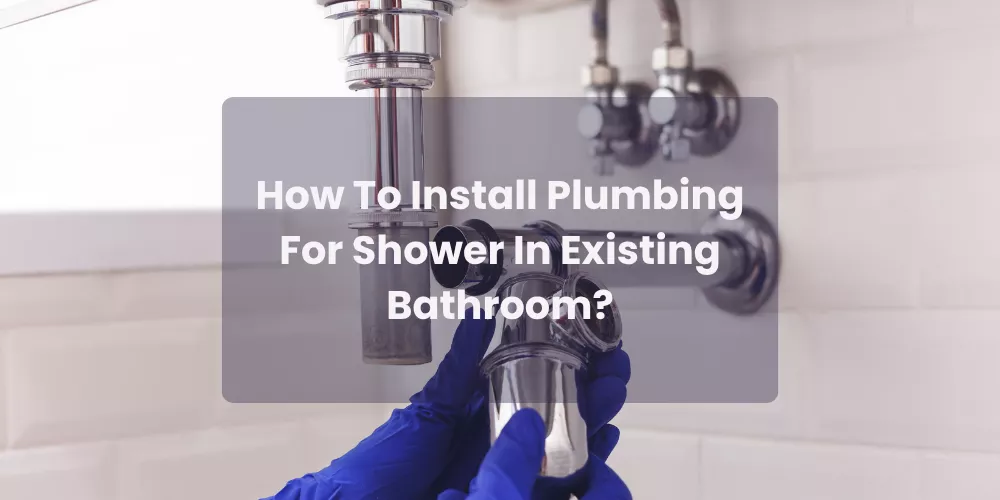
How To Install Plumbing For Shower In Existing Bathroom?
Have you ever looked at your bathroom and thought, “I wish I had a shower here”? You’re not alone. Many American homeowners face a challenge. This is common, especially in older homes. Cities like New York, Chicago, and Philadelphia are good examples. Many homes built before the 1980s were designed with only a bathtub. Adding a shower sounds complicated, but it doesn’t have to be.
Installing plumbing for a shower in an existing bathroom is a key home skill. It’s very useful for improving your home. It gives you more flexibility, adds value to your home, and makes daily life more convenient. If you’re changing a bathroom with just a tub or adding a new shower stall, follow these simple steps.
In this guide, Archie M. Guerrero is a home decoration and repair expert. He is based in New York, NY. He will show you everything you need to know. From gathering the right tools to connecting the final drain line, this post covers it all. You’ll find useful tips. There are safety reminders too. Plus, get answers to common homeowner questions.
This post is part of the Complete Home Plumbing Guide — your go-to resource for all things plumbing at home. If you want to understand your home’s full plumbing system, be sure to check that out too.
Let’s dive in and get your shower project started the right way.
Here are the Key Takeaways for your blog post:
Key Takeaways:
- You can save money by installing shower plumbing yourself. It cuts out contractor fees. Learning to do it is worth the effort.
- Check your local building codes. Get the permits you need. Do this before starting any shower plumbing project.
- Having the right tools and materials ready makes the job faster and safer. You’ll need a P-trap, a shower valve, and PVC pipes.
- Place the drain with a ¼-inch-per-foot slope. Install the P-trap properly. These steps are key for a leak-free shower.
- Seal your shower walls. Check all connections. This protects your home from costly water damage.
How To Install Plumbing For Shower In Existing Bathroom?
Installing shower plumbing in an existing bathroom is a big job. It may seem hard, but you can do it! It involves connecting a drain line, a vent pipe, and hot and cold water supply lines to a central shower valve. The NKBA says bathroom remodeling is a top pick. Many homeowners choose it to improve their homes. It often ranks in the top three in the U.S. When done correctly, a new shower adds both comfort and resale value to your home. Installing plumbing for a shower in an existing bathroom can save you time, money, and stress. Follow these steps to get it done right.
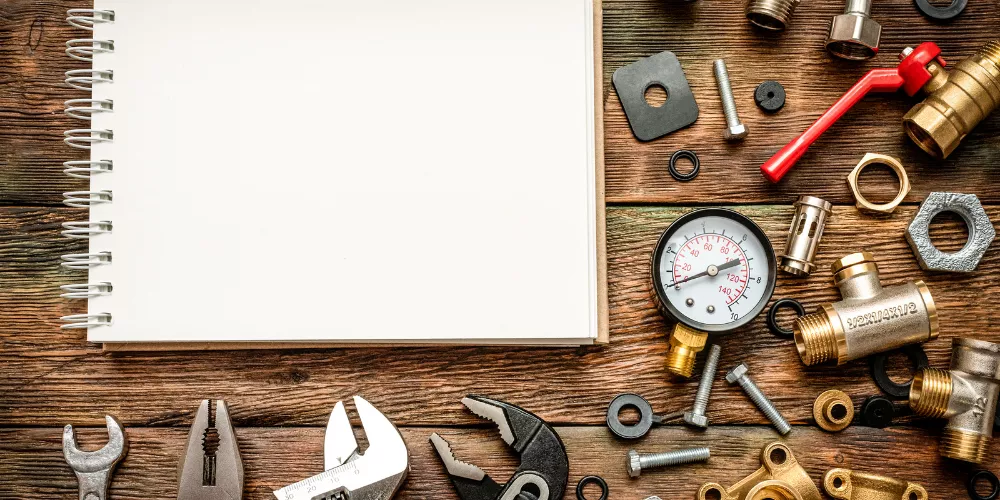
1. Essential Tools and Materials You Absolutely Need
Before you touch a single pipe, you need the right tools on hand. Walking into this project unprepared is one of the biggest mistakes homeowners make. Archie M. Guerrero has seen many DIY jobs go wrong simply because the homeowner skipped this step.
Not sure what everything does or where to get it? No worries. This table breaks it all down in one simple place. You’ll see exactly what each item is for, what it costs on average, and where to buy it in the USA. Save this table before your next trip to the hardware store.
| Item | Type | Purpose | Avg. USA Cost | Where to Buy |
| Pipe Cutter | Tool | Cuts copper or PVC pipes cleanly | $10 – $30 | Home Depot, Lowe’s |
| Drill + Hole Saw Bit | Tool | Drills holes through floor and wall | $40 – $120 | Home Depot, Amazon |
| Adjustable Wrench | Tool | Tightens and loosens fittings | $10 – $25 | Lowe’s, Ace Hardware |
| Level | Tool | Ensures correct pipe slope | $10 – $30 | Home Depot, Amazon |
| Safety Goggles + Gloves | Tool | Protects eyes and hands during cutting | $10 – $20 | Any hardware store |
| PEX Crimping Tool | Tool | Crimps PEX fittings securely | $30 – $80 | Home Depot, Amazon |
| Plumber’s Torch | Tool | Solders copper pipe connections | $20 – $50 | Lowe’s, Home Depot |
| 2-Inch PVC Drain Pipe | Material | Carries wastewater to the main stack | $5 – $15 per 10 ft | Home Depot, Lowe’s |
| P-Trap (2-inch) | Material | Blocks sewer gas from entering bathroom | $8 – $20 | Home Depot, Lowe’s |
| Shower Drain Assembly | Material | Collects and directs water to drain pipe | $15 – $60 | Home Depot, Amazon |
| ½-Inch PEX or Copper Pipe | Material | Carries hot and cold water to valve | $30 – $80 per roll | Lowe’s, Home Depot |
| Shower Valve (Pressure-Balanced) | Material | Mixes hot and cold water safely | $40 – $200 | Home Depot, Amazon |
| Teflon Tape | Material | Seals threaded pipe connections | $2 – $5 | Any hardware store |
| PVC Primer + Cement | Material | Bonds PVC pipe joints permanently | $10 – $20 | Home Depot, Lowe’s |
| Waterproof Membrane (RedGard) | Material | Waterproofs shower walls and floor | $30 – $80 | Home Depot, Lowe’s |
| Cement Backer Board | Material | Provides waterproof wall backing for tile | $10 – $20 per sheet | Home Depot, Lowe’s |
| Plumber’s Putty | Material | Seals drain flange to shower base | $3 – $8 | Any hardware store |
| Air Admittance Valve (AAV) | Material | Vents drain without a roof stack | $10 – $30 | Home Depot, Amazon |
HomeAdvisor says shower installation costs between $2,000 and $9,000. This is for hiring a contractor in the USA. Doing it yourself can cut that cost by 40–60%. That’s a significant saving worth planning for.
Make sure you also check your local building codes before buying materials. Requirements vary by state and city. In New York, for example, you need to pull a permit for most plumbing work that involves opening walls or floors.
Try this today: Write a full tool checklist before heading to your local Home Depot or Lowe’s. It saves time and prevents costly return trips.
2. How To Smartly Plan Your Shower Layout and Drain Location
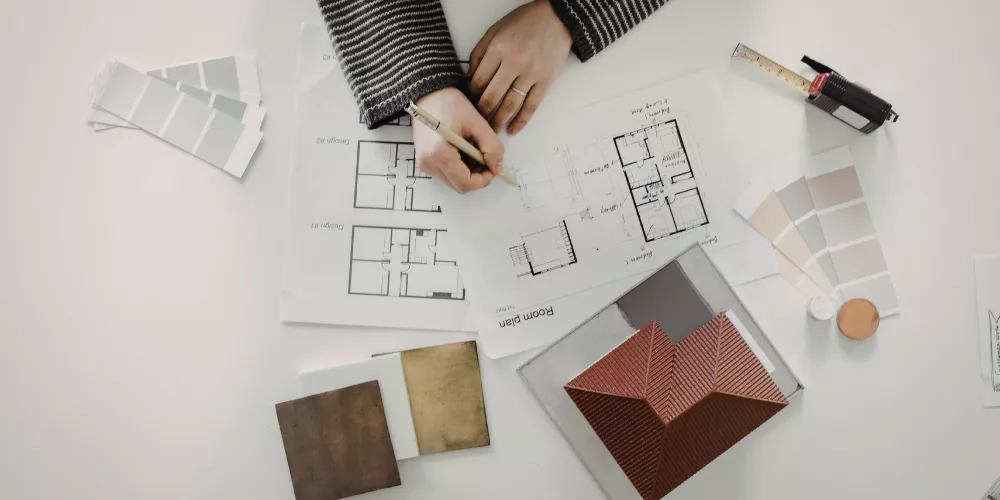
Planning is the most important step in any plumbing project. A poor layout leads to costly fixes later. When Archie works with homeowners in the New York metro area, he measures twice. He also plans three times.
Key planning steps:
- Decide where the shower will be located in the bathroom
- Identify the location of existing drain and supply lines
- Plan the shower drain position (center or offset)
- Check ceiling height if you’re working in a basement bathroom
- Verify the floor joist direction — drain lines must slope toward the main stack
The standard shower size in American homes is 36 x 36 inches, but 36 x 48 inches is more comfortable. Your drain should be positioned so it connects to the main drain stack as directly as possible. A longer drain run increases the risk of clogs and slow drainage.
The drain line must slope at ¼ inch per foot toward the stack. This is a code requirement in most U.S. states and is critical for proper drainage. Use a level to confirm your slope before securing any pipes.
Also, map out where your hot and cold supply lines currently run. In most American bathrooms, they run vertically inside the wall behind the tub or sink. You’ll tap into these lines to feed your new shower valve.
Pro tip: Sketch your layout on graph paper before cutting anything. A simple drawing saves hours of rework.
With your layout confirmed, it’s time to shut off the water and open things up.
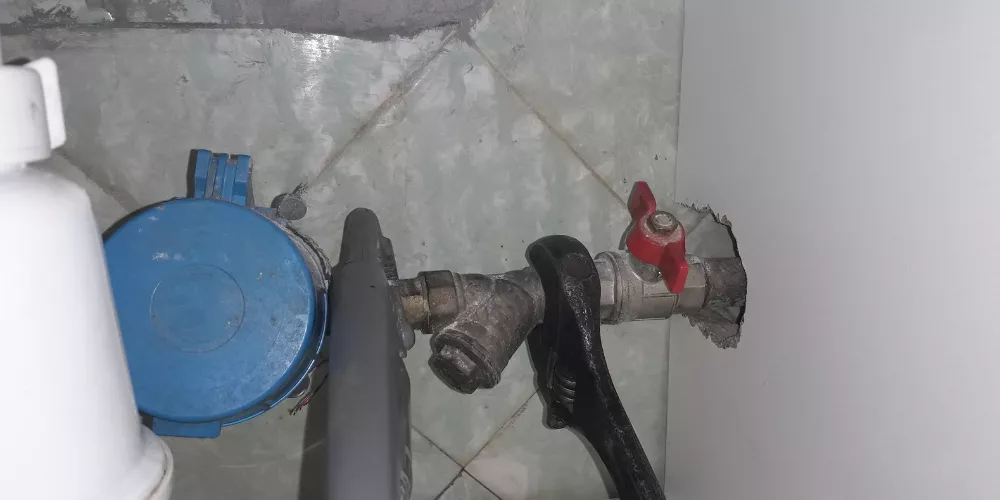
3. How To Safely Shut Off Water and Open the Floor
Safety first — always. This step is where a lot of DIYers get hurt or cause water damage. Do not skip any part of this process.
Steps to safely shut off water and open the floor:
- Locate your home’s main water shutoff valve (usually near the water meter or in the basement).
- Turn off the main valve completely.
- Open a faucet on the lowest floor to drain remaining pressure from the pipes.
- Mark the floor area where you’ll cut using a pencil and straightedge.
- Use a circular saw set to the depth of your flooring material to cut the floor.
- Remove the subfloor section carefully to expose the floor joists below.
- Identify the existing drain line and main stack connection point.
Most modern American homes, built after 1990, use CPVC and PEX pipes. These pipes are easier to work with than older copper or galvanized ones. If your home was built before 1970, you might have galvanized steel pipes. These pipes may need a complete replacement. This is common in older New York City apartment buildings and brownstones.
Safety reminder: Always wear eye protection and gloves when cutting floors. Watch for electrical wires and HVAC ducts hidden beneath the subfloor.
The U.S. Consumer Product Safety Commission says bad plumbing causes water damage. Many claims result from this issue. Poor plumbing is a big problem. It leads to a lot of claims. This happens every year. Taking time to work safely prevents expensive repairs.
Start here: Label your shutoff valve location with a sticky note so every family member knows where it is.
Now that you have access to the subfloor, it’s time to install the drain.
4. How To Properly Install the Shower Drain and P-Trap
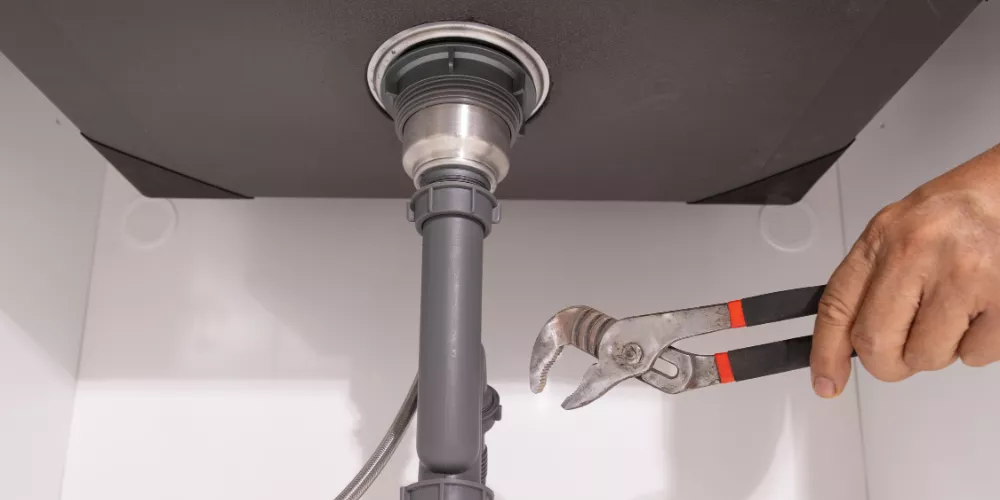
The drain is the heart of your shower plumbing. If it’s not installed correctly, you’ll deal with leaks, odors, and slow drainage for years. This is one area where precision matters most.
How to install the shower drain and P-trap:
- Measure and cut the drain hole in your shower base or pan (usually 2-inch diameter).
- Dry-fit the drain body into the hole to check alignment.
- Apply plumber’s putty around the drain flange before setting it in place.
- Connect the 2-inch PVC drain pipe to the drain body using a coupling.
- Install the P-trap below the floor — it must sit within 24 inches of the drain.
- Connect the P-trap outlet to the horizontal drain line running toward the main stack.
- Ensure the horizontal line has a ¼-inch-per-foot slope toward the stack.
- Glue all PVC joints using PVC primer and cement — let it cure for at least 30 minutes.
The P-trap is essential. It holds a small amount of water that blocks sewer gas from entering your bathroom. Without it, your shower will smell like a sewer — and that’s a health hazard.
In New York City, the NYC Department of Buildings says all drain work must follow the NYC Plumbing Code. This code is based on the International Plumbing Code (IPC) standards. Most U.S. cities follow similar rules.
Choose a drain assembly from trusted brands like Oatey or Sioux Chief. You can find both at Home Depot and Lowe’s.
Do this now: Dry-fit every connection before gluing. It’s the single best way to catch mistakes before they become permanent.
With the drain in place, let’s move on to connecting your water supply lines.
5. How To Connect Hot and Cold Water Supply Lines
Your shower needs two supply lines — one for hot water and one for cold. These lines feed into a central shower valve that mixes them to your desired temperature. This step requires careful measurement and clean cuts.
Steps to connect supply lines:
- Locate the existing hot and cold supply lines inside the wall (usually ½-inch copper or PEX).
- Use a pipe cutter to cut into each line at the point where you’ll add a tee fitting.
- Install tee fittings on both the hot and cold lines.
- Run new ½-inch supply lines from the tees to the shower valve location.
- Use PEX crimp fittings. Or, use solder copper connections. Pick the one that matches your pipes.
- Keep hot on the left and cold on the right — this is the U.S. standard.
- Secure pipes with pipe clamps every 48 inches along studs.
If your home uses PEX piping (very common in homes built after 2000), you’ll need a PEX crimping tool. Brands like SharkBite make push-to-connect fittings that require no soldering — great for beginners.
The PHCC says PEX piping is in 60% of new homes. This means many new houses use PEX. This means many new homes use it. That’s a lot! It’s popular because it’s flexible and easy to install.
Important: Support supply lines properly. This stops vibration and water hammer. Water hammer is the banging sound pipes make when flow suddenly stops.
Quick tip: Use colored tape to label your hot and cold lines. Red means hot, and blue means cold. This helps avoid confusion during installation.
Now, let’s link everything to the shower valve. It’s the key fixture in your new shower.
6. How To Install the Shower Valve and Mixer the Right Way
The shower valve is what controls your water temperature and pressure. Installing it correctly is critical for both comfort and safety. A badly installed valve can lead to scalding or uneven water pressure. You definitely don’t want that.
How to install the shower valve:
- Pick a pressure-balancing valve. It’s required by code in the USA. You can also choose a thermostatic valve. It gives you better temperature control.
- Mount the valve body to the wall studs using the included bracket — typically at 48 inches from the floor.
- Connect the hot supply line to the left inlet and cold to the right inlet.
- Connect the outlet port to the shower arm pipe going up to the showerhead.
- Use Teflon tape on all threaded connections — wrap it clockwise 2–3 times.
- Tighten all connections firmly but do not overtighten — this can crack fittings.
- Install the valve trim kit (handle and escutcheon plate) after tile work is complete.
Brands like Moen, Delta, and Kohler are the most trusted shower valve manufacturers in the U.S. market. The Delta MultiChoice valve is popular. You can upgrade the trim without replacing the valve body. This makes it a smart long-term investment.
The Americans with Disabilities Act (ADA) says shower controls must be 38 to 48 inches high. This is measured from the shower floor. This helps with accessibility. It’s a great standard for any home.
Make it better: Choose a thermostatic valve if your budget allows. It keeps your temperature steady. This happens even when someone flushes a toilet in another part of the house.
Great — your valve is in. Now it’s time to waterproof and test your work.
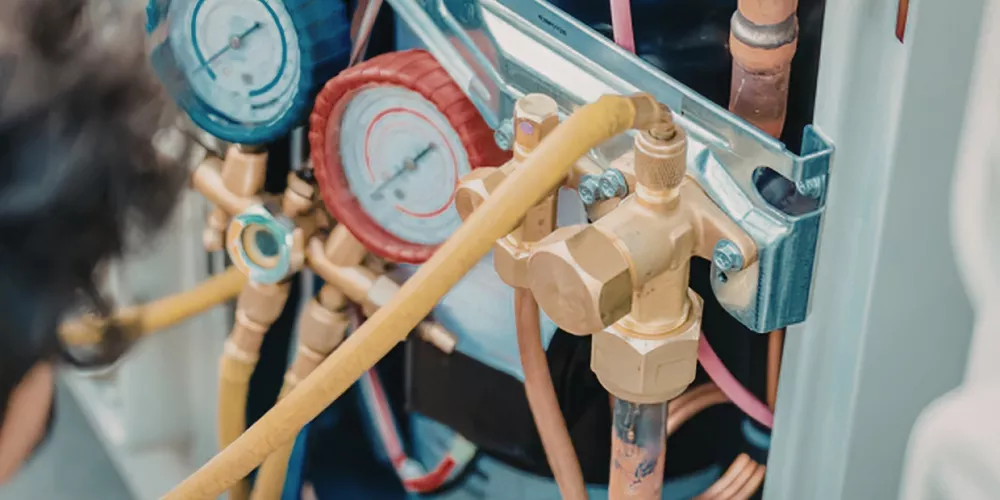
7. How To Waterproof and Test Your New Shower Plumbing
Waterproofing is what separates a long-lasting shower from a water-damaged nightmare. This step keeps your walls, floors, and home safe from moisture. Without it, water could seep in over time.
Waterproofing steps:
- Install cement backer board (like HardieBacker or Durock) on all shower walls.
- Apply waterproof tape to all seams and corners. Then, use RedGard or Schluter KERDI membrane to add a waterproof layer.
- Let the membrane dry fully — at least 24 hours before tiling.
- Seal the shower pan with a liner or pre-sloped foam base.
- Apply silicone caulk (not grout) in all corners and at the floor-wall joint.
Testing your plumbing before closing walls:
- Turn the main water supply back on slowly.
- Check every connection for drips — use a dry paper towel to detect even tiny leaks.
- Run water through the drain and check below the floor for any leakage at the P-trap or drain body.
- Check the valve for proper hot/cold operation.
- Let everything run for 10–15 minutes before declaring it leak-free.
The International Residential Code (IRC) requires a water test. This must happen on all new plumbing. It should be done before closing the walls. Many U.S. municipalities will send an inspector to verify this. Don’t skip the inspection — it protects you legally if you ever sell your home.
Before tiling, run your water test twice. Do it right after installation. Then, do it again 24 hours later when the pressure has stabilized.
You’re almost done. There’s one more critical system to address — your drain vent.
8. How To Handle Venting for Your Shower Drain
Venting is the most overlooked part of shower plumbing — and the most misunderstood. Without proper venting, your drain will gurgle and drain slowly. It might even siphon water out of the P-trap, letting sewer gas in. This is not optional.
How shower drain venting works:
- Every drain needs a vent pipe that connects to the main vent stack.
- The vent stack runs from the basement through the roof, allowing air into the drain system.
- The shower drain vent must connect within 5 feet of the P-trap (per IPC code).
- Vent pipes are typically 1½-inch to 2-inch diameter.
Venting options for existing bathrooms:
- Wet vent: The most common option in existing homes. The drain pipe also serves as the vent for nearby fixtures (like a sink). Works when your shower is close to other plumbing.
- Air admittance valve (AAV): A mechanical valve that allows air in but not out. Legal in most U.S. states (check local codes). Great for shower additions where running a new vent to the roof isn’t practical.
- New vent stack: The most reliable but most invasive option. Requires running pipe from the drain up through the wall and through the roof.
In many older New York homes, adding a shower to a bathroom without a nearby vent stack often calls for an AAV. It’s the most practical solution. Always confirm with your local building department before using an AAV.
Skip the headaches. Call your local building department. Ask which venting method they approve. Do this before you buy materials.
Quick Summary
Installing shower plumbing in an existing bathroom is fun. It takes careful planning. You need the right tools and a sharp eye. Follow each step. Focus on drain placement, waterproofing, and venting. You can install a fully functional shower by yourself, without a contractor. Learning to install shower plumbing in an existing bathroom lets homeowners take charge. It can save them a lot of money, too.
Key Points Covered:
- Gather the right tools and materials before starting any work.
- Plan your shower layout carefully, especially drain placement and slope.
- Always shut off water safely and open the floor with care.
- Install the drain, P-trap, supply lines, and valve in the correct order.
- Waterproof thoroughly and test all connections before closing walls.
Frequently Asked Questions
Still have questions about how to install plumbing for a shower in an existing bathroom? You’re not alone. Many homeowners feel unsure when starting this project for the first time. Here are the most common questions people ask, answered clearly. This way, you can move forward with confidence.
How to install plumbing for a shower in an existing bathroom without major demolition?
You can reduce demolition by using a wet vent system. Also, tap into existing supply lines through small wall access points. SharkBite push-to-connect fittings skip soldering. This lets you open less area. An air admittance valve can replace a full vent stack run. Focus your cuts on the floor near the drain location and one small wall section for the valve. Careful planning is the key to keeping demolition minimal and manageable.
Do I need a permit to install plumbing for a shower in an existing bathroom?
Yes, in most U.S. states and cities you need a permit for this type of work. You must get plumbing permits. This is needed when you add new drain lines or supply lines. It also applies if you change existing plumbing. In cities like New York, Los Angeles, and Chicago, inspections are mandatory. Skipping a permit can lead to issues when selling your home. It might also void your homeowner’s insurance. Always check with your local building department before starting any plumbing project.
How long does it take to install shower plumbing in an existing bathroom?
For a skilled DIYer, the rough plumbing work takes 1–2 days. This means opening the floor. It includes running the drain line. You also need to connect the supply lines. Finally, install the valve. Add another day for waterproofing and drying time. Tile work and finishing add several more days on top of that. A licensed plumber can complete the rough plumbing in about 4–8 hours. Total project time from start to a usable shower is typically 1–2 weeks for a DIY installation.
What size drain pipe do I need for a shower?
Most U.S. building codes require a 2-inch diameter drain pipe for a shower. This is larger than the 1½-inch drain used for bathroom sinks. The 2-inch pipe handles the higher flow rate of a shower and reduces the risk of clogging. Your P-trap should also be 2-inch. If you connect to an older home’s 1½-inch drain, use a reducer fitting. But check local codes. Many inspectors require upgrading to 2-inch pipes.
How do I know if my existing bathroom can support a new shower plumbing installation?
Check four things: First, make sure the floor joists have enough space below for a drain line. It should have the correct slope. Second, check if you can access the hot and cold supply lines. They should be in the wall behind where you plan to put the shower. Third, make sure there’s a nearby vent stack or that an AAV is permitted locally. Fourth, check the water pressure at a nearby faucet — it should be between 40–80 PSI for a good shower experience. If all four check out, your bathroom can support a new shower.
Conclusion
Now you have a complete roadmap for how to install plumbing for a shower in an existing bathroom. This project might feel overwhelming at first. But if you break it down step by step, it becomes easy to handle—even for a first-time DIYer.
Here are your 3 key practical takeaways from this guide:
1. Plan before you cut. Measure twice, sketch your layout, and check local codes. This will help you avoid costly mistakes before you grab a saw. Plumbing projects that fail almost always fail in the planning phase.
2. Follow the correct order. Install the drain first, then supply lines, then the valve. Waterproof before tiling. Test before closing walls. Skipping steps or doing them out of order creates serious problems down the road.
3. Don’t skip venting. Venting is the most overlooked part of a shower installation. A gurgling, slow-draining shower is a sign of a venting problem. Whether you use a wet vent, an AAV, or a new vent stack — get the venting right from the start.
Here’s a great example: a homeowner in Brooklyn, New York, changed a half-bath into a full shower bathroom. They used these steps. He did the plumbing himself using an AAV and SharkBite fittings. This saved him over $4,500 in contractor fees. Plus, he passed his city inspection on the first try.
You can do the same. The most important thing is to start with a solid plan and take it one step at a time. Don’t rush. Double-check every connection. If you’re unsure, call your local building department. They can be more helpful than you think.
If this guide helped you, share it with a friend who’s planning a bathroom renovation. Bookmark it so you can refer back to it during your project. And if you have questions, drop them in the comments below — Archie is happy to help!
Check out the Complete Home Plumbing Guide. It’s your go-to resource for all plumbing projects in your home. Get a better grasp of your entire plumbing system!
