How To Install A Water Softener In Pre Plumbed House?
Have you ever noticed white spots on your dishes or taps that never go away? Or felt your skin dry after a shower? Maybe soap doesn’t make good bubbles. This happens because of hard water, and many people face this problem at home. If you are wondering how to install a water softener in pre plumbed house, don’t worry—it is easier than it looks.
When I first moved into my house, I saw all the pipes and valves near the water heater and felt completely lost. I thought, “How do I even connect everything without breaking anything?” The pipes and small valves looked confusing at first, and I felt nervous.
But then I realized it is not too hard. The pipes are already set up for you—you just need to go step by step. I did it myself, and now the water feels soft, the dishes are clean, and my skin doesn’t feel dry anymore. In this guide, I’ll show you exactly how to do it, just like I learned from my own experience.
What Does a Pre Plumbed House Mean?
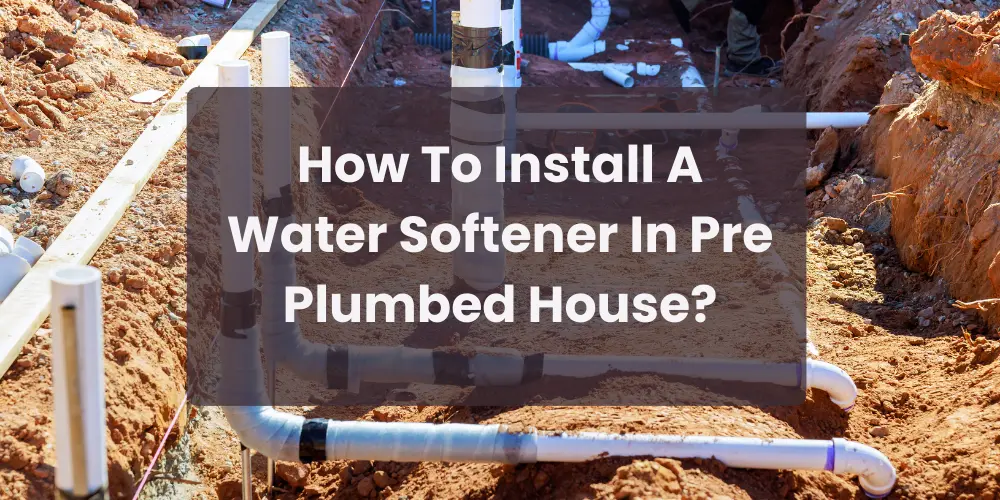
A pre plumbed house is a home where the pipes are already ready for a water softener. The builder has made a space and a loop of pipes so you can connect the softener easily. You don’t have to cut the main water lines or do any big plumbing work.
Usually, you will see a pipe loop near the water heater. There is also a drain nearby and a power outlet for the softener. These are ready to use, so the water softener can work without extra changes.
This makes installing a water softener much easier. You just need to follow the steps to connect it. It saves time, effort, and helps avoid mistakes.
Why Installing a Water Softener Is Important
When I first moved into my house, I saw white spots on my taps and dishes that never went away. My skin also felt dry after showers. At first, I didn’t know why this was happening. Later, I learned it was because of hard water.
Hard water has minerals that slowly build up inside pipes, faucets, and appliances. Over time, this can make water flow slower and leave stains. It can even damage appliances like water heaters or washing machines. Installing a water softener helps stop these problems and protects your home.
Hard water also makes daily tasks harder. Soap and shampoo don’t foam well, so you end up using more than usual. Your skin and hair can feel rough and dry. When I installed my water softener, I noticed that soap worked much better. My skin felt softer too. Soft water makes cleaning easier and life more comfortable.
Installing a water softener is a simple way to save money and prevent long-term problems. It helps your appliances last longer, reduces repairs, and keeps your home cleaner. From my experience, even though it might feel like extra work at first, the results are worth it. You start noticing the benefits quickly.
Tools and Materials You Will Need
Before you install your water softener, first gather your tools. Also, collect all the materials you need. Having everything ready makes the work much easier and faster. You don’t want to start and then realize you are missing something important.
You’ll need a water softener unit. Also, get basic plumbing tools like a wrench or pipe cutter. Don’t forget Teflon tape to stop leaks. You will also need a drain hose to take out water during cleaning cycles. A bucket or some towels can help catch small spills while you work.
From my experience, keeping everything close by makes the job much less stressful. When all the tools are ready, the installation goes smoothly. Spending a few minutes to prepare first can save time. It also makes the process easier to follow..
Tools and Materials Needed to Install a Water Softener
Before installing your water softener, gather the right tools. This short list will save you time and reduce stress. With everything ready, the job gets much easier.
| Tool / Material | Why You Need It |
|---|---|
| Water softener unit | The main system that removes hard minerals |
| Adjustable wrench | To tighten and loosen pipe connections |
| Teflon tape | To stop water leaks at pipe joints |
| Drain hose | To carry waste water during cleaning cycles |
| Bucket or towels | To catch small water spills while working |
| Water softener salt | Helps the softener clean hard water |
How To Install A Water Softener In Pre Plumbed House?
Installing a water softener sounds hard at first, but it is not. Let’s go through how to install a water softener in pre plumbed house step by step and make it easy.
| Step | What You Will Do |
|---|---|
| Step 1 | Turn off the main water supply |
| Step 2 | Find the pre plumbed pipe loop |
| Step 3 | Connect inlet and outlet pipes |
| Step 4 | Attach the drain hose properly |
| Step 5 | Add salt and plug in the unit |
| Step 6 | Turn water back on and test |
Turn Off the Main Water Supply
Before installing your water softener, first turn off the main water supply. This stops water from flowing through your pipes while you work. If you don’t do this, water could spray everywhere and make a big mess.
After turning off the main valve, open a faucet in your house to let out any water that is left in the pipes. This will reduce pressure and make it safer to work on the connections. It also helps prevent leaks while you connect the water softener.
Taking this step seriously will save you a lot of trouble later. It only takes a minute, but it keeps your home dry and makes the installation process much easier and safer.
Locate the Pre Plumbed Loop
The first thing you need to do before installing your water softener is to find the pre plumbed loop. This is the part of your house pipes where the softener will connect. Builders usually set it up, so you don’t have to make new pipe connections. Finding it carefully makes everything easier and safer.
Most of the time, the loop is near your water heater or where the main water comes into your house. You will usually see two pipes. One is for water going into the softener, and the other is for water coming back out to the house. There is often a drain nearby and sometimes a power outlet close to it.
Take your time to look at everything. Make sure the pipes are in good condition and there are no leaks. When you know where the inlet, outlet, and drain are, installation gets easier. It’s that simple. You will feel more confident to start connecting your water softener without stress.
Connect the Water Softener to the Pipes
Now that you have found the pre plumbed loop, it is time to connect your water softener. This step is important. The softener won’t work well if the pipes aren’t connected right. Take your time and do it carefully.
First, check the inlet and outlet on your water softener. The inlet is for water going into the softener, and the outlet is for water coming out to your house. Wrap some Teflon tape on the pipe threads to stop leaks. Then slowly attach the pipes to the right places. Make sure they are tight but do not force them.
It is normal to feel a little confused with all the pipes. Take it one step at a time. Check that each pipe is straight and secure. When you do this slowly and carefully, you water softener will work well and stay safe for a long time.
Attach the Drain Line
The drain line is very important for your water softener. It takes out old water and minerals when the softener cleans itself. Without it, the softener cannot work well, and water might spill on the floor.First, connect the drain hose to the softener. Make sure it fits tightly. Then, run the hose to a floor drain or standpipe. The hose should not be bent or squished, or water might get stuck.
After that, check the hose so it does not move. You can use tape or a clip to hold it in place. When the drain line is ready, your water softener can flush out minerals safely and work properly.
Add Salt and Power the Unit
After you finish connecting the pipes and drain, the next step is to add salt to your water softener. The salt is very important because it helps the softener remove hard minerals from the water. Most water softeners use special water softener salt, which you can buy at stores. Check your softener’s manual to know the right type of salt to use.
Open the lid of the brine tank and carefully pour the salt inside. Fill it up to the recommended level, but do not overfill. Sometimes the tank has a mark or line showing the correct amount. Using the right amount of salt will make your water softener work properly and last longer.
After adding the salt, plug the water softener into the power outlet. The unit needs electricity to run its cycles and clean itself automatically. Once powered, the softener will start its first cycle. Make sure everything is working and there are no problems. This step is simple, but it is very important for the system to work well.
Turn the Water Back On and Test
After connecting your water softener, the next step is to turn the water back on. Do this slowly so the pipes can adjust and you do not cause any sudden pressure. Opening a faucet while turning on the water can help release any air and prevent small bursts or leaks.
Check all the connections carefully as the water starts flowing. Look for any dripping or wet spots around the inlet, outlet, and drain hose. Even small leaks can cause problems later, so it is important to fix them before using the system.
Once everything looks good, let the water softener run its first cycle. This will let it start working and begin softening your water. Keep an eye on it during this first cycle to make sure it works properly and there are no issues. After that, your water softener is ready to use, and you can enjoy soft water in your home.
Common Mistakes Homeowners Make
When I first installed a water softener, I made a few mistakes myself, and I know many homeowners do the same. It’s very normal to feel a little lost at first, especially with pipes, valves, and all the small parts. The good news is that most mistakes are easy to avoid once you know what to watch out for.
One mistake I often see is not checking the connections carefully. Sometimes people forget to tighten the pipes or skip the Teflon tape on threaded joints. I learned the hard way that even a tiny leak can make a big mess. Another common mistake is not reading the manual. I know it feels boring, but every water softener is a little different. Reading the instructions can save you a lot of confusion and prevent problems later.
Some homeowners also use the wrong salt or forget to fill the brine tank at the start. I remember thinking, “It will be fine,” and then the softener didn’t work properly until I fixed it. Rushing through the installation is another big trap. Take your time, check each step, and make sure there are no leaks. Doing this will help your water softener work well and last for many years. Trust me, being patient really pays off.
Installing a Water Softener Yourself vs Hiring a Plumber
Not sure whether to tackle it yourself or hire a plumber? This table compares both choices clearly. It helps you decide what’s best for your home.
| Option | Good Points | Things to Think About |
|---|---|---|
| Do It Yourself (DIY) | Saves money, learn new skills, flexible time | Needs patience and careful work |
| Hire a Plumber | Fast, professional, less stress | Costs more money |
When It Is Okay to Ask for Help
Sometimes, even if you follow the steps, things might not work the way you want. The pipes might not fit, there could be small leaks, or the water softener might not start. If this happens, it is okay to ask for help. Asking for help does not mean you failed. It just means you want to do it safely and correctly.
Getting help can save you time and prevent mistakes. A plumber or someone who knows about plumbing can fix problems quickly. Even a friend or family member who has some experience can make it easier and less stressful.
Remember, installing a water softener can be tricky. It is normal to need help sometimes. Being careful and asking for help when needed is smart. It keeps your pipes and softener safe.
Frequently Asked Questions
Here are some questions about how to install a water softener in pre plumbed house.
The answers will help you understand.They make the steps simple and easy.
Do I need a plumber to install a water softener in a pre plumbed house?
Not always. If your home is pre-plumbed and the pipes are ready, you can often do it yourself. Just follow the steps carefully. But if you feel unsure, asking a plumber is okay.
What tools do I need for installation?
You’ll need a water softener unit, a wrench or pipe cutter, Teflon tape, a drain hose, and a bucket or towel for spills. These are all simple tools most homeowners can use.
How do I know where to connect the water softener?
Look near your water heater or where the main water comes into your house. You should see two pipe ends: one for water going in and one for water coming out. There may also be a nearby drain and a power outlet.
How long does it take to install a water softener?
If your house is pre plumbed and you follow the steps, it usually takes 1–2 hours. Take your time and check for leaks to make sure everything works properly.
Conclusion
Installing a water softener may seem hard at first, but it is easier than it looks. If your house is already pre plumbed, the pipes are ready for you—you just need to follow the steps carefully. By following this guide, you can see how simple how to install a water softener in pre plumbed house can be.
Once it is done, you will have soft water, cleaner dishes, and smoother skin. Take your time, check your connections, and don’t be afraid to ask for help if you need it. With a little patience, you can do it yourself and enjoy all the benefits of soft water at home.