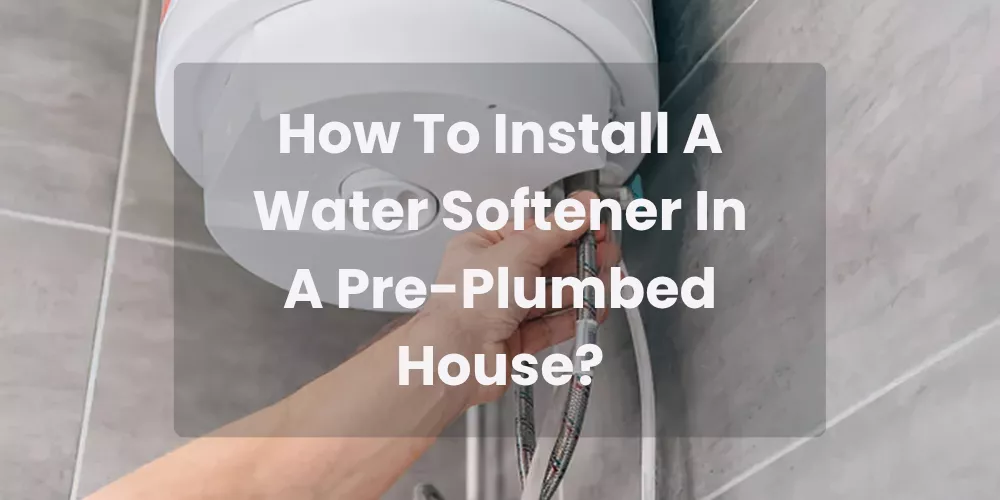
How To Install A Water Softener In A Pre-Plumbed House?
Does your skin feel dry after a shower? Do you see white buildup on your faucets? How about on your showerheads? If that’s true, you likely have hard water. Every day, millions of American homeowners struggle with this issue.
Hard water has a lot of calcium and magnesium.These minerals can hurt your pipes. They can also damage your water heater and appliances over time. They cause soap to lather poorly. They also leave spots on dishes and glassware. What’s the good news? Learning how to install a water softener in a pre-plumbed house is easier than most people think.
If your home is pre-plumbed for a water softener, you’re in a good spot. Pre-plumbed houses have a specific area close to the main water line. A bypass valve and drain connection are usually ready for you. You don’t have to cut new pipes or hire a plumber for a full install.
The U.S. Geological Survey says that about 85% of homes in America have hard water. States like Texas, Arizona, Florida, and California are hit hard. Homeowners in New York often have moderately hard water. This is common in many areas. A water softener safeguards your home and enhances your daily life.
In this guide, Archie M. Guerrero is a Home Decoration and Repair Specialist from New York. He will walk you through the entire process. You’ll find everything you need here, from choosing the right unit to completing the setup. This post is part of the Complete Home Plumbing Guide series, so you can explore related plumbing topics there too.
Let’s jump in and install your water softener correctly.
Key Takeaways
- Installing a water softener in a pre-plumbed house is easier. The bypass valve and connections are already set up.
- Finding the right size water softener matters for your home’s water use. Always shut off the main water supply before starting the installation process.
- Salt-based ion exchange softeners work best for hard water in the USA. They are the top choice for this problem.
- Regular maintenance is key. Fill the salt and clean the brine tank. This keeps your softener running well for years.
How To Install A Water Softener In A Pre-Plumbed House?
Putting a water softener in a pre-plumbed house is a smart home upgrade. A pre-plumbed home comes with a dedicated space. It has a bypass valve, drain line, and water line connections all set up. This cuts your installation time in half compared to a standard install. You skip the tough plumbing tasks. Instead, you focus on connecting and setting up your new unit. The Water Quality Association (WQA) says water softeners help appliances last 50% onger. They truly make a difference. You can save money on repairs and replacements. This helps homeowners save a lot of money each year.
What Is a Pre-Plumbed House for a Water Softener?
“Pre-plumbed” means parts are ready to use. Knowing this makes installation easier. You’ll feel more confident.Many new homes in the USA are built with plumbing for a water softener. This is common in hard water states like Texas, Arizona, and Florida.
What pre-plumbing typically includes:
- A bypass valve assembly (usually a 3-valve bypass or a single bypass unit)
- Inlet and outlet connections on the main water supply line
- A drain line connection near a floor drain or utility sink
- An electrical outlet nearby for the control head
- Enough space for a standard-sized softener unit
When a home is pre-plumbed, the builder runs the water lines to a set spot. This is usually in the garage, utility room, or basement. Just connect your softener to the current setup.
Why this matters: If you skip ahead, check your pre-plumbing setup first. Otherwise, you might face connection problems. Check the bypass valve and pipe connections before you buy your unit. Label the inlet and outlet clearly. Most bypass valves have arrows. These arrows show which way the water flows.
In New York and other northeastern states, people often install in utility rooms. Basements are also common spots for this. In warm places like Arizona, garages are common.
Try this today: Check your pre-plumbing area. Spend 10 minutes on it before you buy any equipment. This step saves you both time and money later.
Essential Tools and Materials You Need Before You Start
Get ready first. This will make installation easy. It will also be stress-free. Rushing to the hardware store during a project wastes time and slows you down. A quick trip to Home Depot or Lowe’s, two top home improvement stores in the USA, will get you most of what you need.
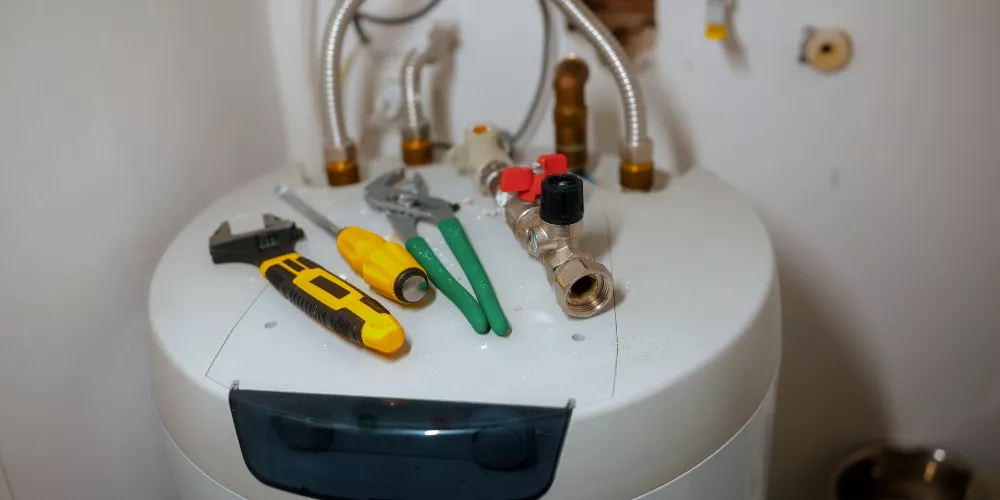
Tools you will need:
- Adjustable wrench or pipe wrench
- Teflon tape (plumber’s tape)
- Tubing cutter or hacksaw
- Flathead and Phillips screwdrivers
- Bucket and towels (for water spillage)
- Measuring tape
- Level
- Safety glasses and work gloves
Materials you will need:
- Water softener unit (correctly sized for your home)
- Water softener salt (solar, evaporated, or rock salt)
- Flexible supply lines or push-fit fittings (if needed)
- Drain line tubing (usually 1/2 inch or 3/4 inch)
- Drain line clamp or zip tie
Many pre-plumbed homes have the main connections set up. Having flexible connectors ready is a smart move. They help you align the softener easily with the existing lines.
A 2023 HomeAdvisor survey showed that homeowners spend about $150–$300. This is for tools and materials needed for DIY water softener installation. That’s only a small part of the $500 to $1,000 a plumber might charge for that job.
Getting everything ready first saves 30 to 45 minutes. You avoid a lot of back-and-forth. Try this today: Make a checklist. Gather all your tools the night before installation day.
How To Choose the Right Water Softener for Your Home
Choosing the wrong size or type of softener is a common mistake for homeowners. The right unit depends on your water hardness and daily water use.
Step 1: Test your water hardness. You can buy a simple water test kit at Home Depot for under $20. Hardness is measured in grains per gallon (GPG). Anything above 7 GPG is considered hard water.
Step 2: Calculate your daily water usage.The average American uses 80–100 gallons of water each day. Multiply that by how many people live in your home to find your daily total.
Step 3: Match Your Usage to a Softener Capacity Here’s a simple guide:
- 1–2 people: 24,000-grain capacity unit
- 3–4 people: 32,000–48,000-grain unit
- 5+ people: 64,000-grain unit or higher
| Household Size | Daily Water Use | Water Hardness (GPG) | Recommended Capacity | Best For |
| 1–2 People | 80–160 gallons | Up to 10 GPG | 24,000 Grains | Apartments, couples |
| 1–2 People | 80–160 gallons | 11–20 GPG | 32,000 Grains | Small homes, hard water areas |
| 3–4 People | 240–320 gallons | Up to 10 GPG | 32,000 Grains | Average family, moderate hardness |
| 3–4 People | 240–320 gallons | 11–25 GPG | 48,000 Grains | Average family, hard water |
| 5–6 People | 400–480 gallons | Up to 15 GPG | 48,000 Grains | Larger family, moderate hardness |
| 5–6 People | 400–480 gallons | 16–30 GPG | 64,000 Grains | Larger family, very hard water |
| 7+ People | 560+ gallons | Any level | 80,000+ Grains | Large households, high usage |
| Any Size | Any usage | Iron present | Add 4 GPG per 1 PPM iron | Homes with iron in water |
Popular brands used across the USA:
- Fleck (very popular for DIY installs)
- Whirlpool
- Morton
- GE Appliances
- Pentair
Salt-based ion exchange softeners are the top choice. They perform great. They exchange calcium and magnesium ions for sodium ions. This process gives you soft water in every part of your home. Salt-free conditioners are another option. However, they don’t remove hardness minerals. They just help prevent scale.
For a pre-plumbed house, ensure your unit fits the existing bypass valve size. Most residential bypass valves are 1 inch. Check yours before ordering.
Try this today: Check your water hardness. Then, calculate your household usage before buying a unit.
How To Install a Water Softener in a Pre-Plumbed House — Step by Step
This is the core of the process. Follow these steps closely, and your installation will be easy. Always check your unit’s manual, too. Brands like Fleck and Whirlpool might have different connection details.
Step 1: Shut off the main water supply. Find your main water shutoff valve and turn it off. Then, open a faucet in the house to relieve pressure in the lines.
Step 2: Put the bypass valve in bypass mode. Turn both handles on the bypass valve. This allows water to flow around the softener, not through it. Now you can work safely.
Step 3: Position your softener unit. Put the mineral tank and brine tank by the bypass valve. Check the mineral tank with a level to ensure it stands upright. An uneven tank can lead to lasting operational issues.
Step 4: Connect the inlet and outlet lines.
- Connect the incoming hard water to the “IN” port on the bypass valve.
- Connect the outlet for outgoing soft water to the “OUT” port.
- Use Teflon tape on threaded connections. It helps prevent leaks.
- First, hand-tighten. Then, use a wrench. Don’t over-tighten.
Step 5: Connect the drain line. Run the drain line from the control valve to a nearby floor drain or sink. Don’t put the end of the drain line in water. This stops backflow. Use a clamp to secure the line.
Step 6: Connect the brine tank overflow tube. Also, run the overflow hose from the brine tank to the drain. This is a safety feature for overfill situations.
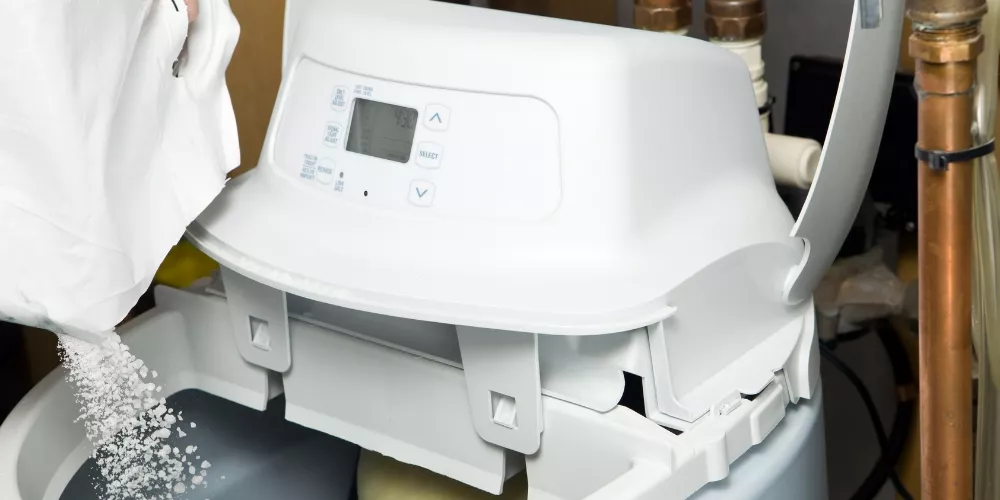
Step 7: Add water softener salt to the brine tank. Fill the brine tank until it’s about one-third full with the right salt type. Don’t fill too much.
Step 8: Plug in the control head. Plug the power cord into the nearest outlet. Most control heads use standard 110V power.
Step 9: Slowly turn the bypass valve to service mode. Slowly open the bypass valve. This lets water flow into the softener. Check all connections for drips or leaks.
Step 10: Run a manual regeneration cycle. Start a manual backwash. Then, follow the instructions in your manual for regeneration. This flushes the resin bed. Then, it primes the brine tank.
Fleck’s guidelines say that well-installed units can last more than 20 years. They need regular maintenance to last that long.
Try this today: Follow each step in order. Check for leaks after each connection before moving on.
How To Set Up the Control Valve and Regeneration Cycle
Once you install the softener, you need to program the control valve. This step is very important. This is what makes the system run on its own. If you skip or rush this step, you’ll get poor softening results. You’ll also waste salt.
What the control valve does: It manages softening. It also controls the regeneration process. It tells your softener when to clean and how much salt to use. Most modern units, such as those with a Fleck 5600SXT head, have digital displays. This feature makes programming easy.
Key settings to program: Current time and day: Make sure to set this correctly. Regeneration usually happens overnight, around 2 a.m.
- Water hardness level: Enter your GPG hardness number. If there’s iron content, add that too. Remember, 1 PPM of iron equals about 4 GPG of hardness.
- Regeneration Frequency: Most units regenerate every 7 to 10 days. They can also regenerate based on volume. Regeneration triggered by demand is more efficient.
- Salt dose per regeneration: Look in your manual. It will tell you how much salt to use based on your unit’s resin tank size.
Demand-initiated regeneration (DIR) is the smartest setting. The softener checks your water use. It regenerates only when it needs to. It saves salt and water. The WQA states that DIR systems use up to 30% less salt than timer-based systems.
For families in New York or areas with iron in the water, using an iron filter before the softener is a good idea. It helps improve water quality.Iron can mess up the resin bed over time.
Try this today: Read your control valve manual for 15 minutes. Then, set all the programs correctly. Do this before your first regeneration cycle.
How To Test Your Water Softener After Installation
Check your softener after installing it to make sure it’s working right. Don’t skip this step. It’s your quality check before using the system every day.
How to test properly:
- Run all bypass water first. Run cold water from the faucet for 2–3 minutes to clear the lines.
- Test water hardness at the tap. Use a test strip or a digital hardness meter. Soft water should show 0–1 GPG.
- Check for salt bridges. Look inside your brine tank. A salt bridge is a hard crust that forms above the water level and prevents brine from forming properly. Break it up with a broom handle if you spot one.
- Check for leaks. Check each connection. This includes the inlet, outlet, drain line, and overflow tube. Do this 24 hours after installation.
- Verify regeneration happened. Check the control head display. It shows if the first regeneration cycle was a success.
Signs your softener is working:
- Soap creates a better lather.
- No white residue on faucets after one week.
- Skin feels smoother after a shower.
- Dishes come out of the dishwasher clean and shiny.
Homeowners in the USA often notice a change. This happens in just **2–3 days** after their softener starts. This is true for families in tough water areas. This includes places like Phoenix, Arizona, and parts of Texas.
Test your water hardness today. Do it right after the first regeneration cycle. Then, compare it to your reading before softening.
Common Mistakes To Avoid During Water Softener Installation
Even seasoned DIYers can mess up when installing a water softener. Look for signs. They can help you avoid leaks. They also prevent poor performance and costly repairs later.
Top mistakes to avoid:
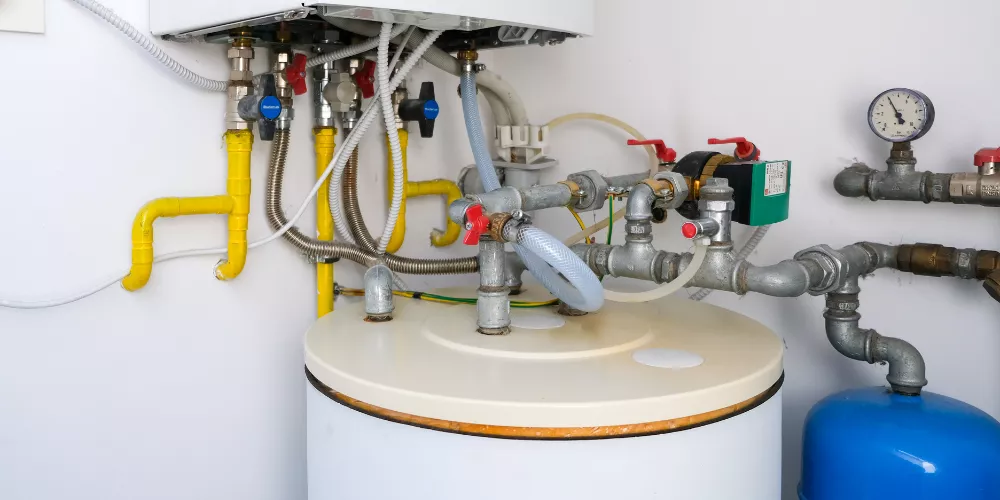
- Installing on the wrong water line: Install it on the main cold water supply line. Do this before it branches to your water heater. This setup protects your whole plumbing system.
- Skipping Teflon tape: Every threaded connection needs Teflon tape. If you miss one, it can cause a slow drip. This drip may damage your floor over time.
- Incorrect bypass valve direction: The inlet and outlet ports are labeled. It’s common to reverse them, which stops the softener from working.
- Submerging the drain line: The drain line end needs an air gap. If it’s submerged in water, backflow can occur. This can contaminate your softener.
- Overfilling the brine tank with salt: Fill it one-third full to start. Overfilling causes salt bridges and mushing. These clumps of wet salt block brine formation.
- Skipping the manual regeneration cycle: Always run a manual cycle after installation. This helps prime the resin bed and clear out any debris from the installation.
- Not checking local codes: Some cities in California and Texas have rules. They limit how water softeners can discharge. Always check local regulations before installing.
Bob Vila is a trusted home improvement expert. He says that not following installation steps is the main reason water softeners don’t work well. It can also cause them to fail early.
Try this today: Print this list. Check off each point as you install.
How To Maintain Your Water Softener for Long-Lasting Performance
A water softener is a smart investment.Caring for it ensures it lasts 15–20 years or longer. Maintenance is easy and takes under 30 minutes each month.
Monthly maintenance tasks:
- Check the salt level: Keep the brine tank at least one-quarter full. The salt should sit a few inches above the water level.
- Break up salt bridges: Gently poke the salt in the tank with a broom handle. This stops crusting.
- Inspect for mushing: Slushy, wet salt can block brine flow at the bottom. Clean the tank every year if this occurs.
Every 6–12 months:
- Clean the brine tank: Rinse out any leftover salt. Then, clean the tank with fresh water. Remove any sediment or buildup.
- Use resin cleaner: Products like Res-Up and Iron-Out keep your resin bed clean. This is especially important if you have iron in your water.
- Check all connections for leaks: Inspecting twice a year helps spot small drips early. This way, you can avoid bigger issues..
UUse the right salt type:
- Evaporated salt pellets are the purest and best for most systems.
- Solar salt crystals are a cheap option. They save money.
- Rock salt is the least expensive option, but it has many impurities. This can cause buildup in the tank.
You can find Morton Salt and Diamond Crystal at Walmart. They are also at Costco and Home Depot. These stores are all across the country.
The Water Research Foundation reports that homeowners save 60% on repairs. This happens when they take care of their softeners. Regular maintenance really helps. This is true over the softener’s lifetime.
Try this today: Set a monthly reminder on your phone. Check your salt level and inspect your brine tank.
Quick Summary
Installing a water softener in a pre-plumbed house is an easy DIY project. It saves you money and helps protect your home. Since the bypass valve, inlet/outlet connections, and drain line are already in place, the process is faster and simpler than a standard installation. Choosing the right size unit, following each step carefully, and programming the control valve correctly are the keys to a successful install.
Key Points Covered:
- Pre-plumbed homes have bypass valves and water line connections already in place, making installation much easier.
- Choosing the correct grain capacity based on your water hardness and household size is essential.
- The installation involves connecting inlet/outlet lines, the drain line, and programming the control valve.
- Always run a manual regeneration cycle after installation and test water hardness to confirm the system is working.
- Regular maintenance — checking salt levels, cleaning the brine tank, and using resin cleaner — extends the life of your softener significantly.
Frequently Asked Questions
Installing a water softener raises a lot of questions. That is completely normal.
Over the years, Archie M. Guerrero has heard the same concerns from homeowners across the USA. So we rounded up the most common ones right here.
These answers are short, clear, and jargon-free. Whether you are just getting started or already mid-install, this section on how to install a water softener in a pre-plumbed house has you covered.
How do I know if my house is pre-plumbed for a water softener?
Check your utility room, garage, or basement near the main water supply line. Pre-plumbed homes have a bypass valve (usually a 3-valve setup or a single bypass unit) already installed. There will also be inlet and outlet connections on the main line and a nearby drain. If you are unsure, look at your home’s builder documentation or call a licensed plumber for a quick inspection. Many new homes built after 2000 in hard water states like Texas and Arizona come pre-plumbed as a standard feature.
How long does it take to install a water softener in a pre-plumbed house?
For most DIY homeowners, installing a water softener in a pre-plumbed house takes about 2–4 hours. Because the bypass valve and connections are already in place, you skip the hardest plumbing steps. The main time is spent positioning the unit, making connections, programming the control valve, and running a manual regeneration cycle. If you encounter unexpected issues like corroded fittings, add another hour or two to your estimate.
Can I install a water softener myself or do I need a plumber?
Yes, you can absolutely install a water softener yourself in a pre-plumbed house. The process is designed for DIY homeowners. You need basic tools like an adjustable wrench, Teflon tape, and a screwdriver. No soldering or pipe cutting is typically required in a pre-plumbed setup. However, if your home is not pre-plumbed, cutting into the main water line is a job better left to a licensed plumber. Always check local building codes before starting — some areas require permits.
How much salt does a water softener use per month?
The average water softener uses about 6–8 pounds of salt per regeneration cycle. How often it regenerates depends on your water hardness level and household usage. For a family of four with moderately hard water, expect to use roughly 40–50 pounds of salt per month. Demand-initiated regeneration (DIR) systems are more efficient and use up to 30% less salt than time-based systems. Salt costs about $5–$10 per 40-pound bag at stores like Walmart or Costco.
What are the signs that my water softener is not working properly?
Common signs include hard water returning to your taps, white scale buildup reappearing on faucets, soap not lathering well, and a stiff feeling to laundry after washing. Inside the unit, look for salt bridges (a hard crust in the brine tank) or salt mushing (wet, clumpy salt at the bottom). If water hardness test strips show elevated GPG levels after softening, your resin bed may be exhausted or fouled. Try running a manual regeneration cycle first. If problems persist, contact the manufacturer or a water treatment professional.
Conclusion
Learning how to install a water softener in a pre-plumbed house is one of the best investments you can make in your home. Soft water is better for your skin, your pipes, your appliances, and your wallet. The good news is that if your home is pre-plumbed, you have everything you need to get it done in a single afternoon.
Here are 3 practical takeaways to remember:
1. Prepare before you start. Test your water hardness, choose the right size unit, and gather all your tools before installation day. Preparation is what separates a smooth install from a frustrating one.
2. Follow every step in order. From shutting off the main water supply to running the first regeneration cycle, each step builds on the last. Skipping steps leads to leaks, poor performance, or equipment damage.
3. Maintain your softener regularly. Check salt levels monthly, clean the brine tank annually, and use resin cleaner if you have iron in your water. A well-maintained softener can serve your home for 20 years or more.
Take a family in Phoenix, Arizona as an example. Their water hardness measured 18 GPG — extremely hard. After installing a 48,000-grain Fleck softener in their pre-plumbed home, they saw their water heater run more efficiently, their skin felt noticeably softer, and their monthly cleaning time dropped because the soap scum and scale buildup was gone.
As Archie M. Guerrero always says: the right repair done right the first time saves you far more than any shortcut ever will.
You have everything you need right here. Go grab your tools, check your pre-plumbing setup, and get that water softener installed today. Your pipes, your appliances, and your family will thank you.
Did this guide help you? Share it with a neighbor or friend who is dealing with hard water. Drop your questions in the comments below — we love hearing from homeowners across the USA!